Konica Q-mini
Introduction
| Announced | July 1997 |
|---|---|
| Camera type | Compact digicam |
| Camera size | 290 grams 93 x 51 x 94 mm (inc. batteries) |
| Sensor type | CCD |
| Sensor size | 1/3" (4.8 mm x 3.6 mm) |
| Resolution | 640 x 480 (0.3 megapixel) |
| Memory card | Compact Flash |
| Battery | AA x 3 |
| Lens | 6mm 1:2.8 (35mm equiv. 42mm) |
If you just want to see some photographs, skip straight to the results section.
Pushing further back further into the murky depths of digital camera history, I found this interesting little camera from July 1997. This is a period when cameras with enough resolution to pass even the most basic photography tests (i.e. making a nice looking small "en-print" of around 150 x 100 mm) were still extremely rare. In 1998, just one year later, 1+ megapixel cameras with at least semi-amateur-friendly price tags were just starting to become available in quantities that required the fingers of both hands to count. But in 1997 there were only one or two, and this camera, dear reader, is not one of them! It is however and interesting representative of a moment early in the journey of the digital camera from computer peripheral to serious photographic instrument.
The vast majority of cameras in 1997 produced files 640 x 480 pixels, which is just slightly over 0.3 megapixels, and the Konica Q-mini is a fairly typical example of this species. And it's a pretty basic little beast: no zoom lens, no auto-focus (the lens is manual focus but designed to be used as a fixed-focus lens in most sitations), and no manual controls. But with only 0.3 megapixels to play with, you're really not capturing anything like enough detail to make any advanced functionality remotely worth it! Camera's like this really only barely qualify as real cameras at all, they're really just computer accessories. This camera's only technological feature to set it apart from the competition was a (slightly!) tiltable rear monitor.
This camera wasn't made by Konica, whatever it says on the front: it was made by Panasonic, and also sold by them as Panasonic NV-DCF1. Perhaps a little more surprisingly, this camera was also marketed by photography leviathan Canon as the Canon PowerShot 350. The Canon version has a slightly modified cosmetic design, but it's still the same camera underneath.
Buying a Konica Q-mini in 2025
This camera is in fact quite a rare little thing, but don't let that make you think it has any real value. In December 2025 I paid slightly over £19 (including P&P) for one in very nice (in fact almost unused) and fully working condition. The fact this camera is really only of interest to geeky collectors, and has no real photographic value, no doubt contributes to that. Having said all that, the Canon version of this camera sells for upwards of £60 due to the caché of a much more famous photographic name. So I suppose if you want an example of this camera without paying silly money you should probably be looking for the Konica or Panasonic variants, rather than the Canon.
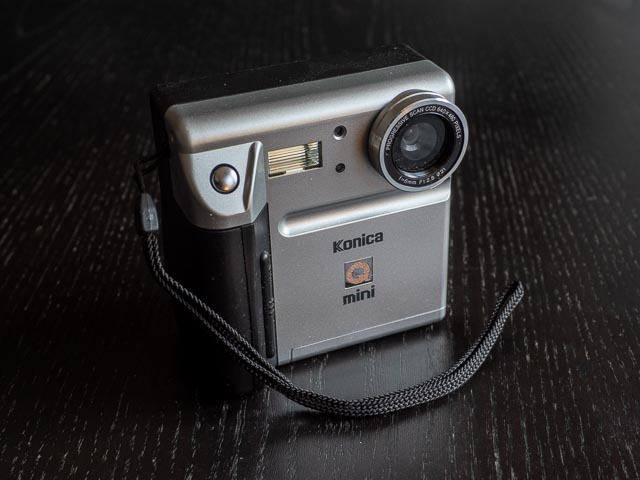
Konica Q-mini body tour
 The Q-mini presents an unusual taller-than-wide face to the world. With the exception of the shutter button, pretty much all the controls are on the back of the camera. The lower part of the camera back has exactly the kind of small and dark monitor its vintage should lead you to expect. And in the complete absense of any kind of optical viewfinder, even a basic tunnel-type one as found on most early digicams, live-view on this monitor is your only way to compose your images.
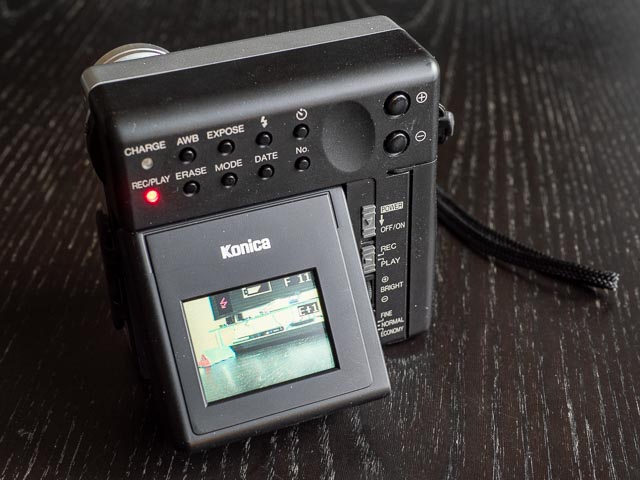
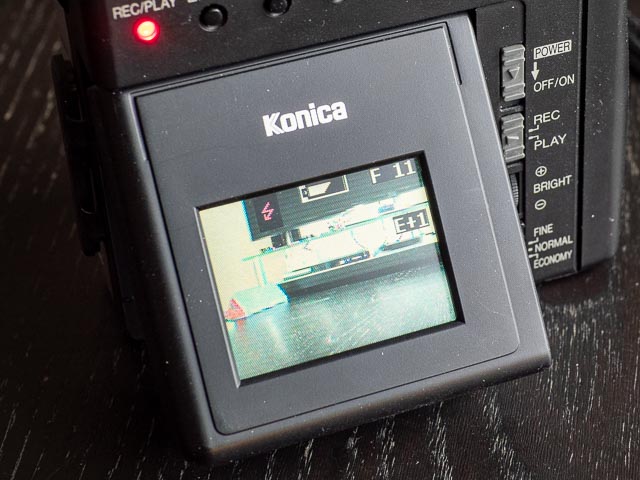 You get a few indicators on the rear monitor to give you some idea as to what is going on: The red flash symbol tells is that the flash will fire automatically; next we can see the battery status, and the final indicator on the top row tells that reads "F 11" us we are recording Fine images and there is space for another 11 files (so no, it's got nothing to do with the aperture being f/11
  ). And finally to the middle right of the monitor we can see exposure compensation is set to +1.
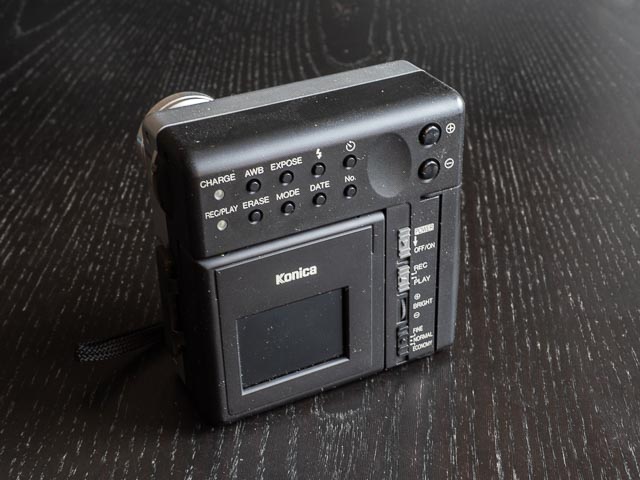
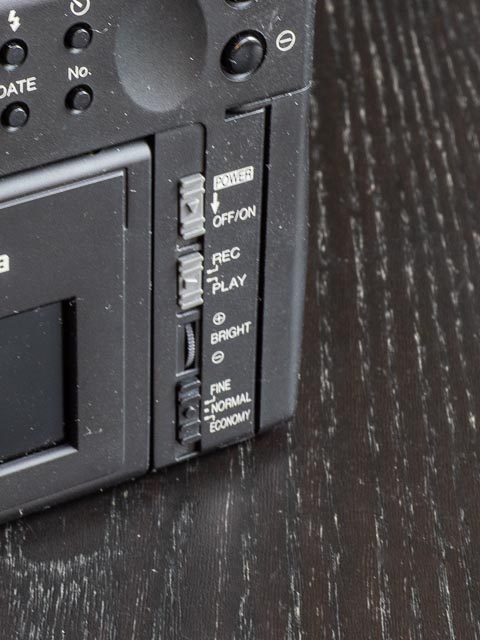 To the right of the monitor are a selection of slider controls plus one wheel control. The top slider is a power switch which immediately returns to it's original position to allow the camera to be turned back on when it switches off automatically, which it will do after a couple of minutes. Like most early digicams, the Q-mini has discrete modes for recording or playing back images, and below the power switch is a slider control to set one or the other. Then we have a wheel to set the brightness of the monitor (it goes from dark to slightly less dark!). Finally we have a slider control for setting image quality. The options are fine (recommended in the instruction manual for special images and those you may later transfer to a computer), normal (recommended for most images) and economy (only recommended for images you only plan on keeping temporarily). But even though the manual this is described as a resolution setting, all images are recorded at 640 x 480 px regardless of the setting. What you're actually setting here is actually the degree of compression: 1 fine = 2 normal = 4 economy.
On many digicams (even ones as old as the Q-mini) this kind of thing is set in the menus, but one thing you won't find on this camera is any kind of menu button! Everything is set using external controls like the slider controls discussed above, or the buttons along the top of the back of the camera, speaking of which:
Let's start with the lights: the charge light indicates the batteries are charging (though in the absense of this camera's AC adapter I never had cause to pay any attention to this light… I always charged the 3 AA batteries in a standard external charger) and the rec/play light to indicate card activity. In rec mode t lights up and flashes to indicate a file is being written to the memory card, and in play mode the same thing indicates a files is being read from the memory card. Especially given how long these operations take (7 or 8 seconds in each case) it's actually quite handy to know the camera is actually doing something while you wait.
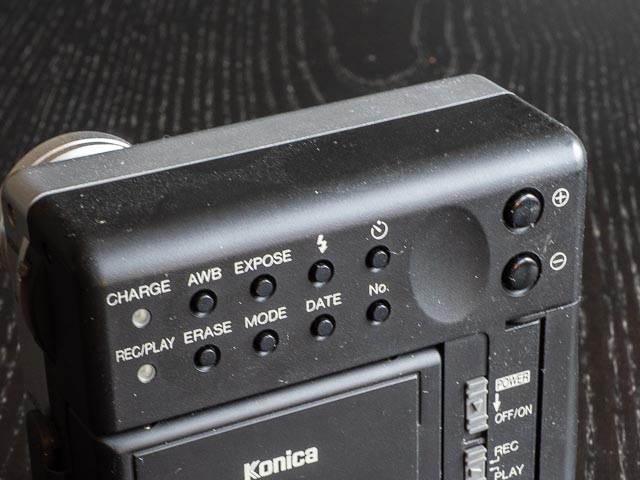 So far pretty much what you'd expect, huh? But this isn't always the case with the buttons! Let's take a look at the top row which are all rec (or shooting) mode functions:
- The AWB (Auto White Balance) button lets you set a manual white balance.
- The Expose button is in fact an exposure compensation feature. You hold down the button and use the +/- buttons to set a value somewhere between +4 and -4.
- Next button is the Flash mode button. Simply keep pressing it to cycle though the flash modes. If you turn the camera off flash mode with return to the default setting of Auto.
- Finally we have the self-timer button. Press this before you hit the shutter button to delay the shutter release by 10 seconds.
The second row of buttons concern play mode or set-up functions:
- The Erase let's you delete photos when in play mode. But you'll need to read the instruction manual to find out how… hint… you use the plus minus butons to navigat through your stored images and then press the shutter buttons to actually delete an image.
- Don't let the Mode button fool you into thinking this camera has a selection of sophisticated exposure modes! All this button does is let you switch between 1, 4 and 16 images per screen in play mode.
- The Date button is proably the only button in the second row that does exactly what it's label leads you to expect: it let's you set the date.
- The No button: any guesses as to the function of this button? When you press it a bored toneless voice says "computer says no". Only joking…. (If that refernce leaves you puzzled, Google will enlighten you
 .) This button lets you display or hide the images remaining indicator on the rear monitor. Why you would want to disable this is utterly beyond me, but the designers had space for an eighth button so I suppose they had to invent a function for it!
Finally we have the +/- buttons. These have two main functions: one is to set exposure compensation in conjunction with the Expose button, and the second is to advance though stored photos in play mode.
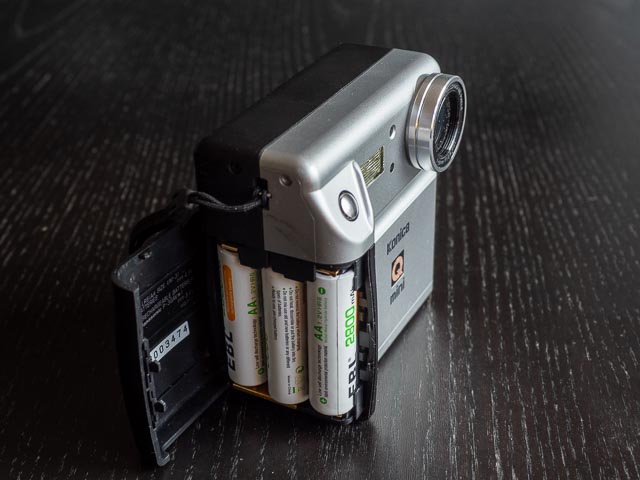
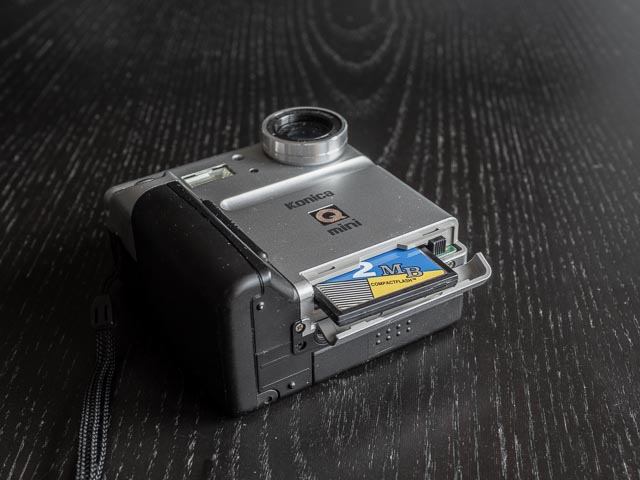 Moving to the right hand side of the camera (as you're using it) we have the battery compartment which takes 3 standard AA batteries. On the bottom of the camera you'll find the memory card compartment which takes normal Type 1 Compact Flash cards. I had a 10mb card handy which worked fine and was able to hold up to 40 shots with image quality set to fine.
 Moving to the left hand side you'll find a small selection of ports (video out for connecting the camera to a TV with the cable that was supplied with the camera), digital in/out (the Q-mini was made before USB was common, so I'm not sure what exactly this port is, but it required a connection kit which Konica sold as an option extra) and the DC in port (again, the power adapter was an optional extra). I didn't have any cause to use any of these ports as I used a card reader to get files of the CF card, and a normal AA battery charger to charge the batteries.
Also on the left and side of the camera is the final control: a lever to set the camera to macro mode. This is in fact a manual focus control that can be set to any position between normal and macro, a fact that really didn't dawn on my dozy brain before I read the instruction manual in detail. (I had assumed that you had to set this lever to normal or macro.) The idea is that when set to the "normal" end of the scale you can treat the lens as a fixed focus lens with everything from 70cm to infinity in focus. For things closer than 70cm you need to adjust this lever until the image looks in focus on the rear monitor with a closet focusing distance of 3cm. But given how dark the rear monitor is I was not brave enough to try out the macro focusing!
Using a Konica Q-mini in 2025
Phew…! For such a simple camera the body tour took longer than I was expecting. It has to be said that for the most part the only controls you really need to bother with are the on switch and the shutter button! but that doesn't mean this camera isn't full of the quirks that are typical of a vintage digicam. The first of which is that shutter button… pretty much every camera in the history of digital photography has a two stage shutter button; the first half-press activates the auto-focusing and auto-exposure systems and you get a beep when the camera is ready to shoot, and a full press actually takes the photograph. But not here. Of course that manual/fixed focus lens means the camera doesn't have to acquire focus, so any press of the shutter button takes an immediate photo. I shot plenty of photos by mistake until I got used to this .
And of course you have to get used to this camera's lethargic turn of speed. It might shoot tiny 0.3mp photos, but it still takes 7 or 8 seconds to write files to the memory card and there is no buffer to speak of, so the camera immediately locks up until file writing is complete. But that's really just all part of the geeky fun of using a nearly 30 year old camera, isn't it? One you get used to it the sheer simplicity of this camera is actually makes this camera a very pleasant companion for casual snap shots…
Konica Q-mini results
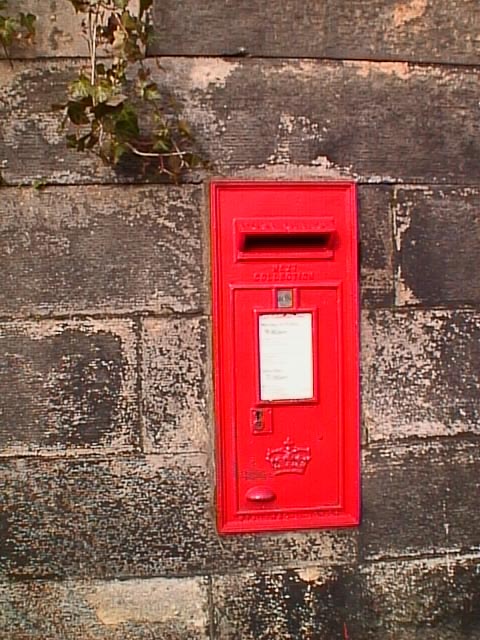
…until, that is, you come to look at the photos on your computer . These early sub-megapixel cameras really only barely qualify as cameras at all! On my website you can usually click on the images in a gallery like this to make them bigger… but not here. The files you see below are the full resolution 640 x 480 pixel files, massaged a little to taste in lightroom to make them look as nice as possible, which, to be honest, isn't very nice  .
.
These files look pretty pixelated in even small 150 x 100mm prints. They're also generally a bit under-exposed, quite low contrast, rather yellowish, and have plenty of barrel distortion. With the exception of barrel distortion I've tried to compensate (at least somewhat) for these problems in Lightroom.
Just one year after this camera was launched 1.5mp (or there abouts) cameras were starting to come onto the market which can make very nice 150 x 100mm prints, and even surprisingly satisfying A4 prints. One example is the Minolta DiMÂGE EX (launched in August 1998). But I suppose the files from this camera still have a certain, what shall we call it…? Period charm?